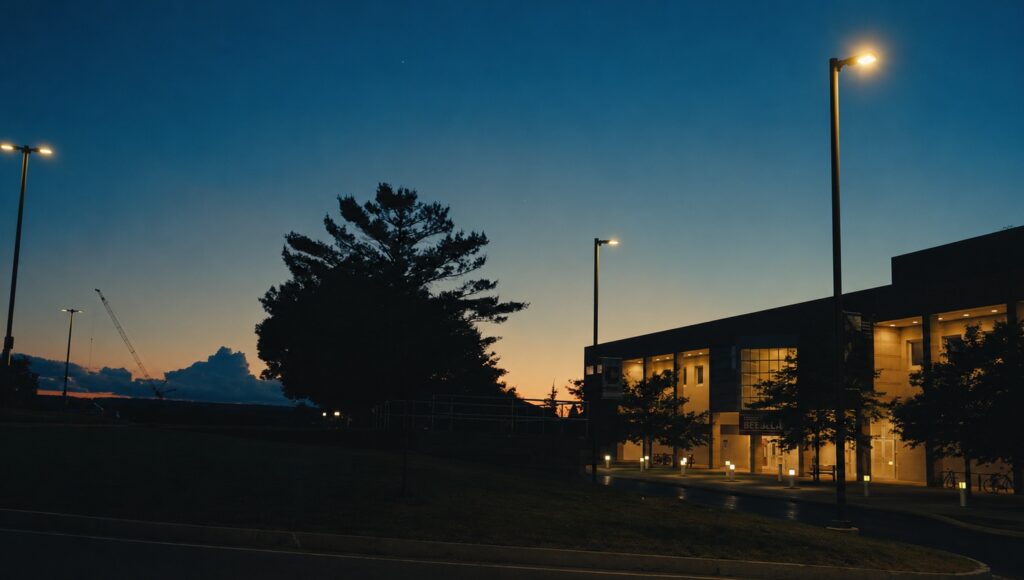






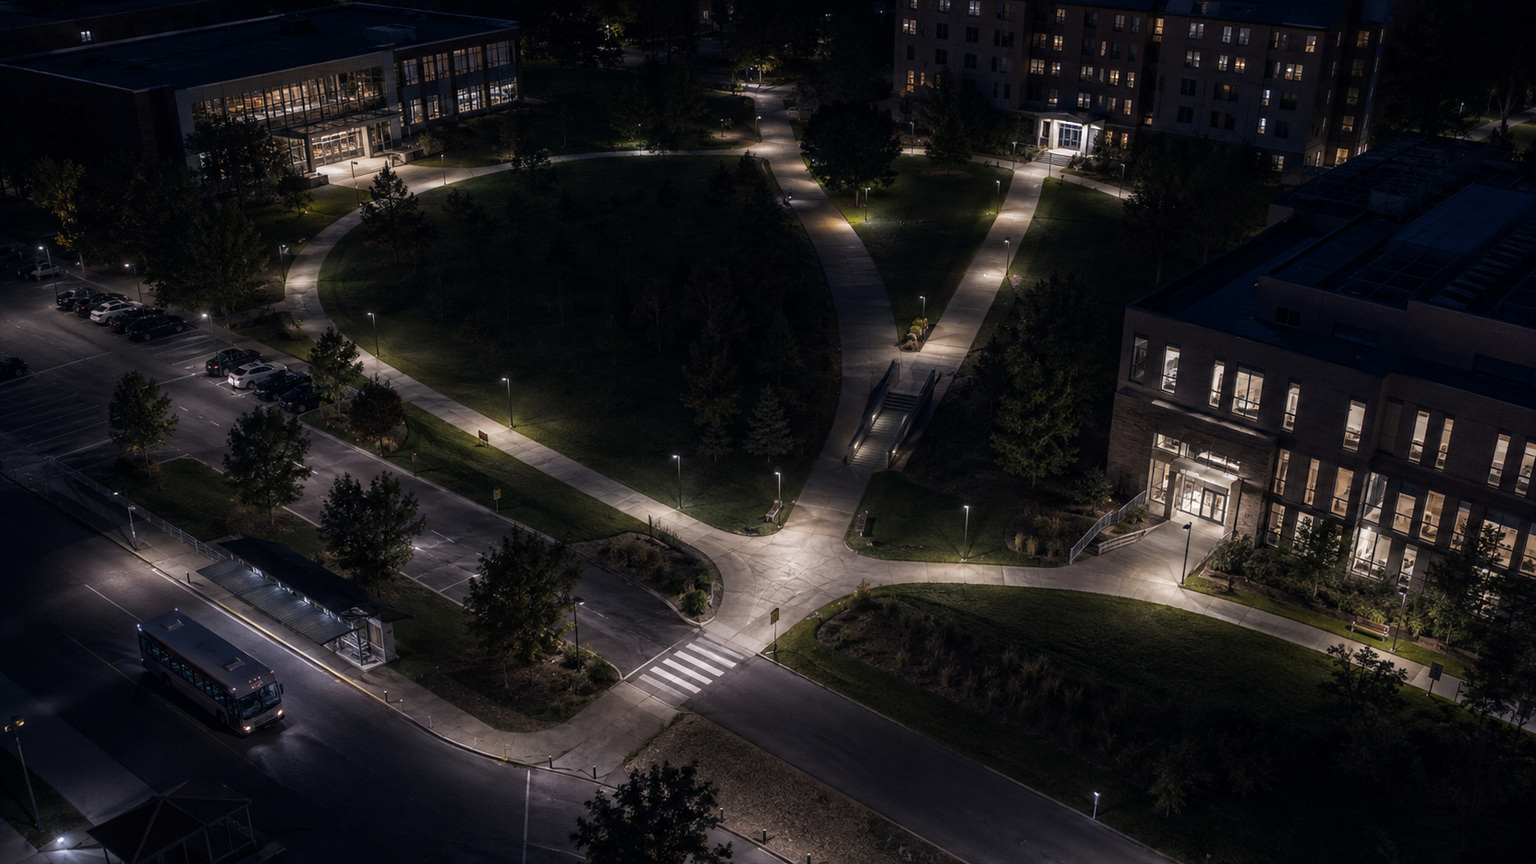
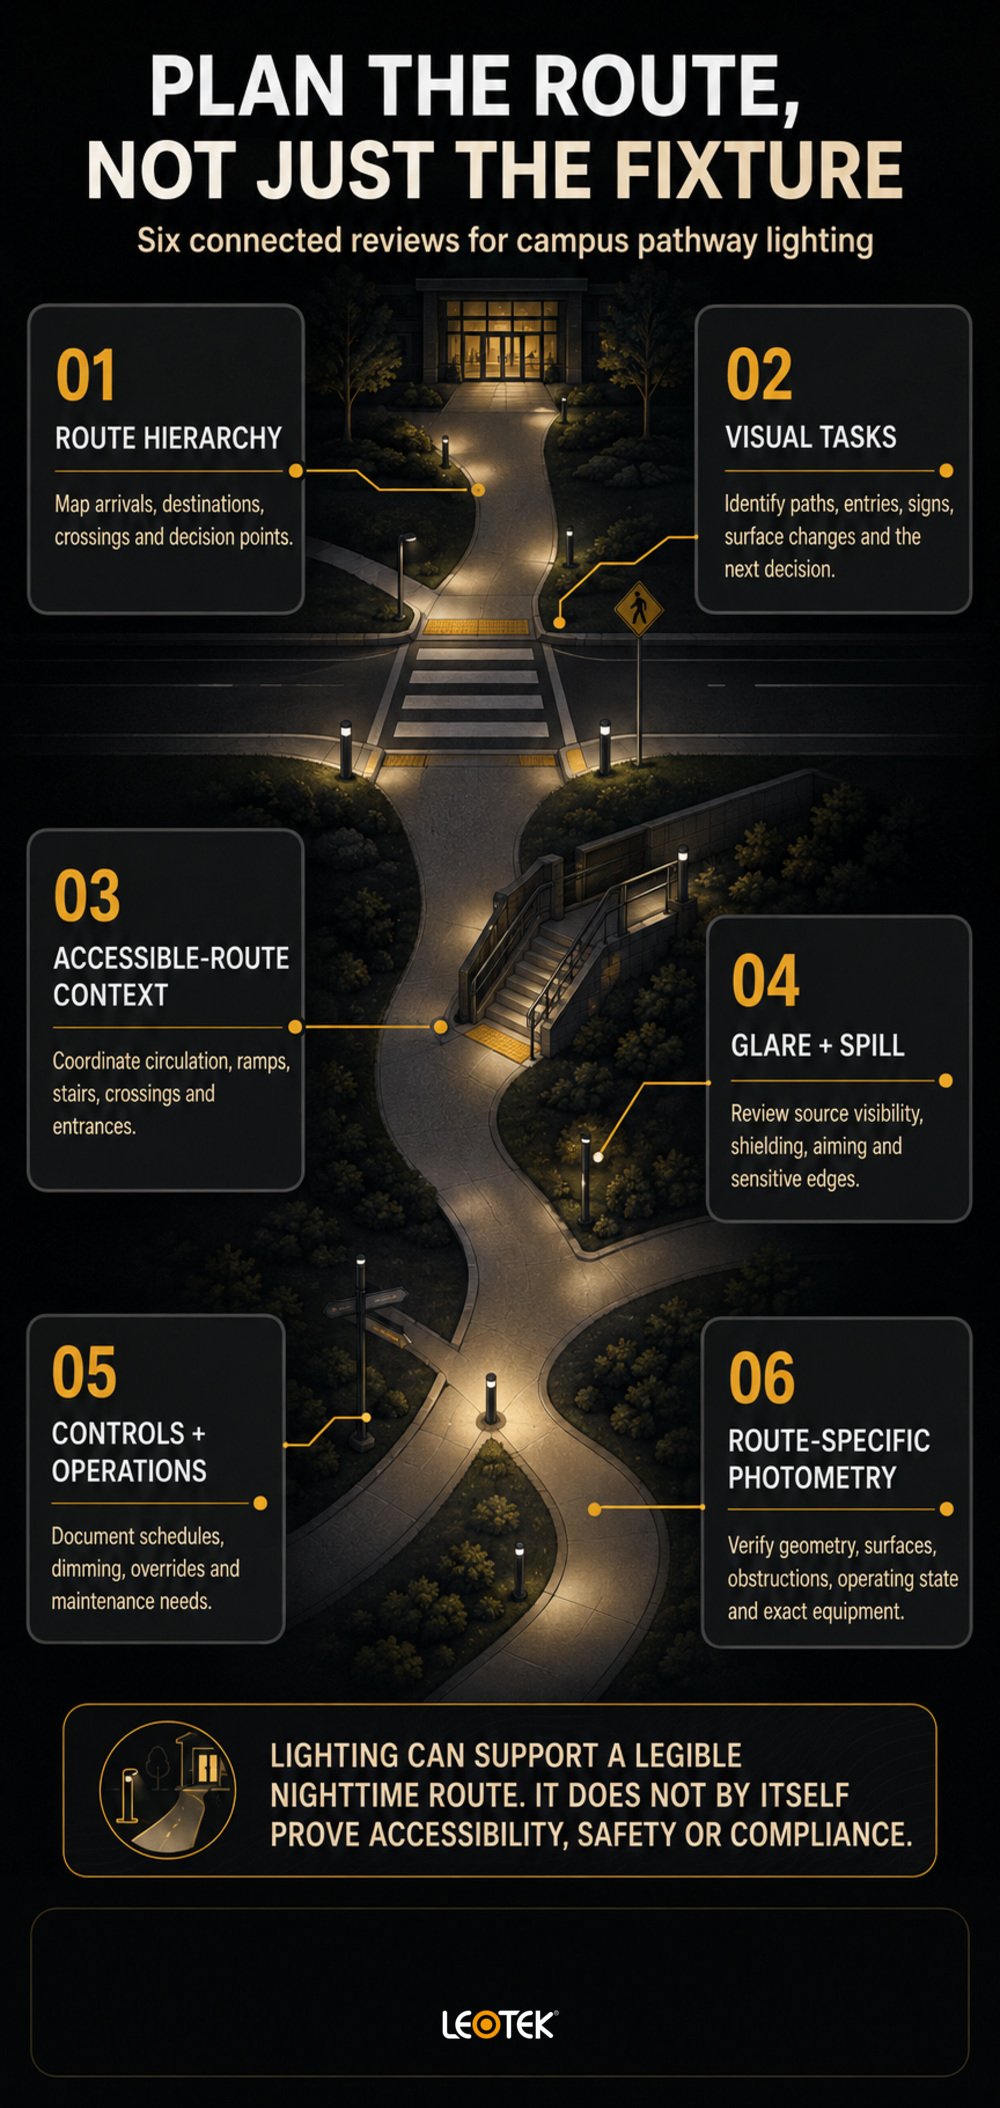
Campus pathway lighting should be planned around the routes people use after dark, not selected as a stand-alone fixture exercise. A useful plan connects route hierarchy, visual tasks, wayfinding, accessible-route context, glare and spill control, controls, project-specific photometry, and documentation review.
The objective is not to make every exterior space equally bright. It is to give facilities, planning, engineering, and procurement teams a disciplined way to decide where light is needed, what people need to see, and what documentation should support a final design.
A campus pathway lighting plan should evaluate:
- Route hierarchy, nighttime destinations, and decision points.
- Accessible-route context, crossings, entries, signs, and surface changes.
- Glare, spill, aiming, shielding, and controls.
- Route-specific photometry and current product documents.
Key takeaways
- Start with a nighttime inventory of routes, arrival points, crossings, entries, and decision points.
- Coordinate lighting with accessible circulation, signs, stairs, ramps, and surface changes rather than treating light as a separate layer.
- Review where light lands, potential glare, spill into adjacent spaces, and controls through route-specific photometry.
- Do not use one number, a fixture data sheet, or a color-temperature choice as proof that a path is accessible or appropriate.
- Confirm local requirements and current product documents before a campus issues a specification or procurement package.
Start with the campus path network
Campus pathways often link different kinds of destinations: transit stops, parking areas, residence halls, academic buildings, civic facilities, public spaces, and service areas. A lighting plan is more useful when it begins with that network and the people moving through it, rather than with a catalog of luminaires.
Map arrival points, destinations, and decision points
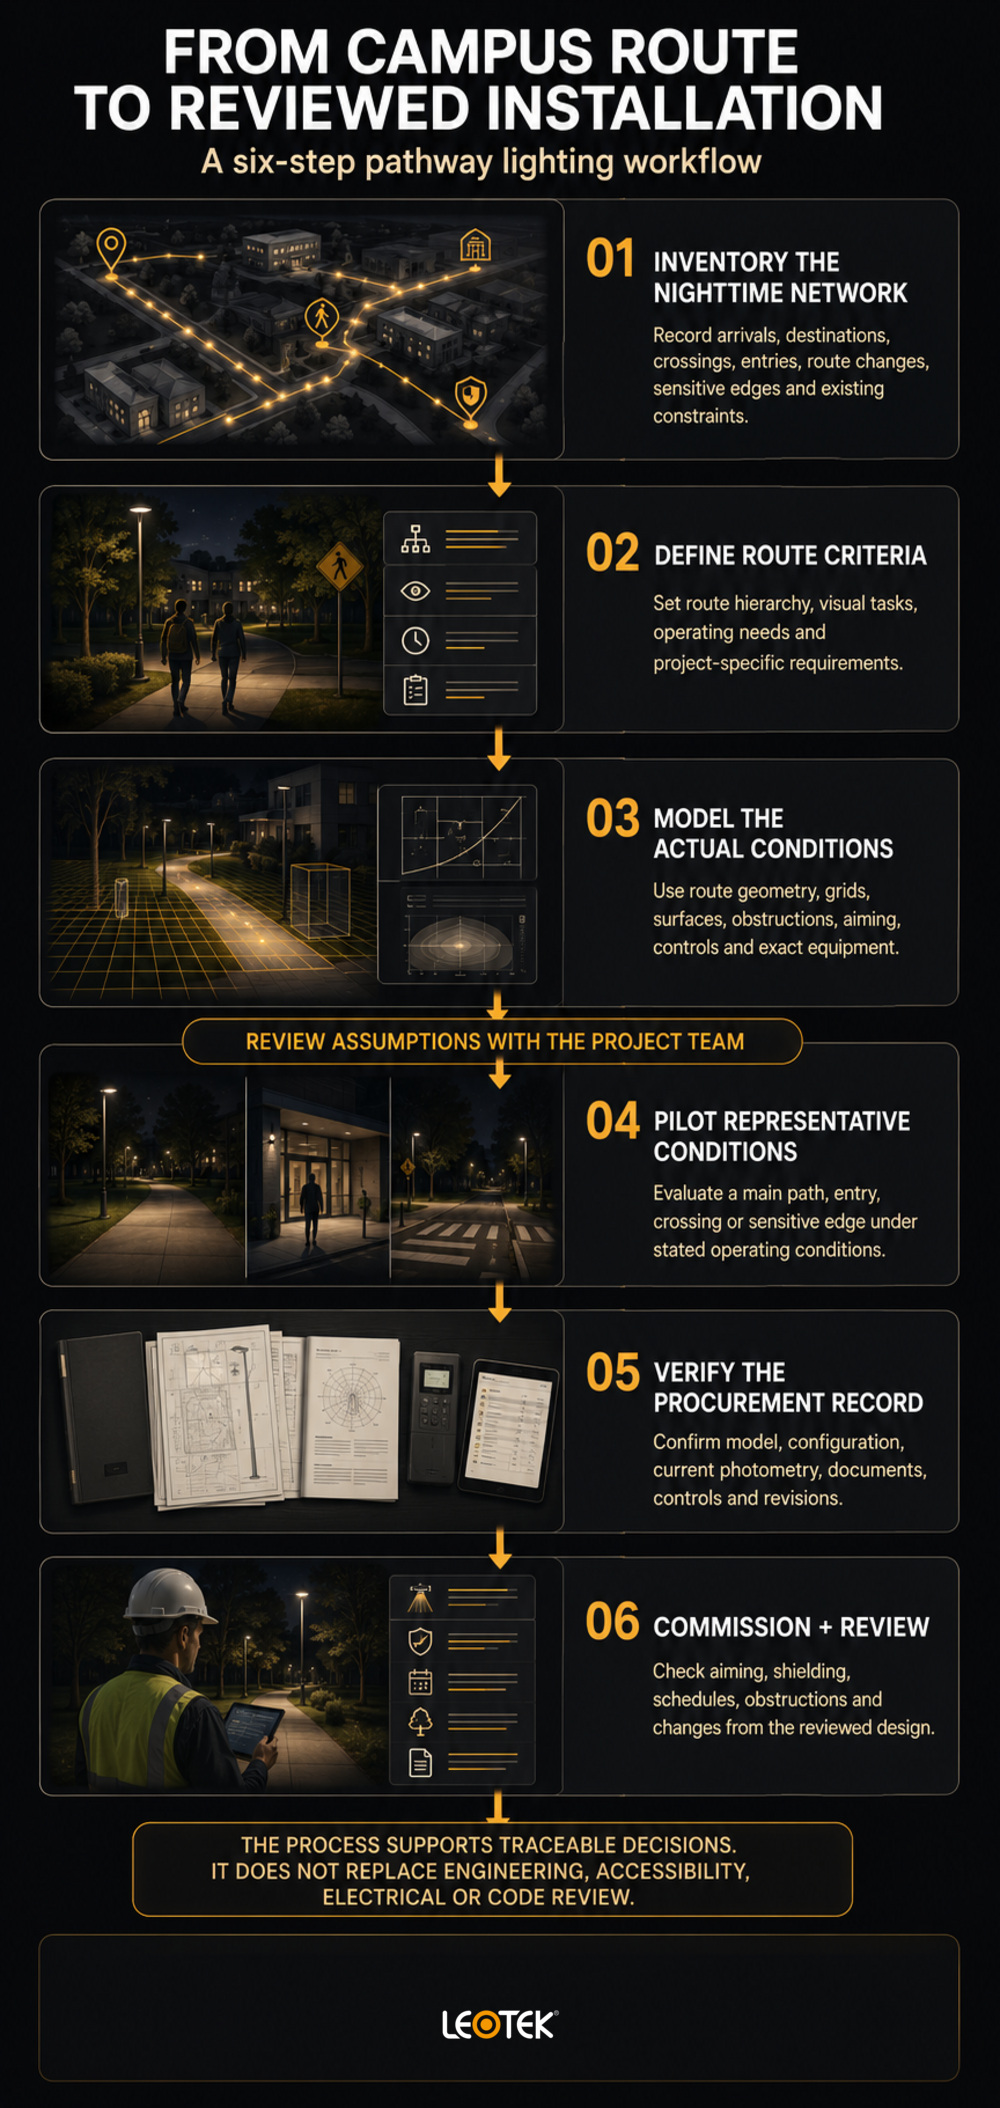
Create a route inventory that identifies where people arrive, where they need to go, and where they must make a choice. A pathway that leaves a parking area may meet a crossing, split toward two buildings, pass a bicycle route, and end at an entrance. Each of those conditions can create a different visual task.
The U.S. Access Board explains that, where required, accessible routes within a site connect arrival points with accessible buildings, facilities, elements, and spaces. It also explains that accessible routes generally coincide with, or are in the same vicinity as, general circulation paths. See its Guide to the ADA Accessibility Standards: Chapter 4. That guidance concerns route accessibility, not a prescribed lighting level. It is still a useful planning prompt: the nighttime route should be understandable along the same travel network people use during the day.
For each route, document the conditions that may affect the lighting review:
- origins and destinations;
- crossings, curb transitions, stairs, ramps, and changes in level;
- intersections with bicycles, service vehicles, and loading activity;
- signs, maps, building identifiers, and emergency call points;
- adjacent residences, classrooms, habitat areas, or other sensitive edges; and
- maintenance access, existing poles, trees, utilities, and mounting constraints.
This inventory gives the lighting designer and campus team a shared basis for deciding what requires closer evaluation. It also helps prevent a common planning error: treating a route as a continuous line when it is actually a series of distinct situations.
Establish route hierarchy before selecting equipment
Not every path serves the same role. A main pedestrian spine, a short connector between two buildings, a transit approach, and a service-adjacent walkway can have different hours of use, visual priorities, and constraints. Establishing a hierarchy helps teams concentrate detailed review where people need to navigate, detect changes in the route, or make decisions.
The hierarchy should also identify exceptional conditions. For example, a route near a residence hall may need careful consideration of spill toward windows. A path beside landscaping may need an aiming review that accounts for seasonal growth. A route that leads to a transit stop may need the campus to coordinate its assumptions with the agency or property owner responsible for the stop. These are design questions to resolve with the project team, not universal rules.
After the planning criteria are defined, readers exploring category-level options can review outdoor lighting applications. A category page is a navigation aid, however, not proof that a particular product, configuration, or installation is appropriate for a campus route.
Plan for visibility and wayfinding together
Pathway lighting supports more than seeing the pavement immediately in front of a pedestrian. At decision points, people may need to recognize the continuation of a route, an entry, a sign, a change in surface, or a crossing. The design should therefore evaluate the sequence of visual information along the route.
Light the visual task and the next decision
At a simple, straight walkway, the immediate walking surface may be the primary visual task. At a junction, a person may need to see a directional sign, a building entrance, a branch in the path, or the approach to a crossing. The lighting review should examine those conditions deliberately rather than assuming a uniform pattern will serve all of them.
This is also why lumens alone do not describe pathway performance. Lumens describe total light output from a source; they do not show how light reaches a particular walking surface, sign, or adjacent area. Geometry, distribution, mounting, surface reflectance, obstructions, and aiming matter. For a primer on the related terms, see watts, lumens, and lux. Project-specific calculations and site observations remain necessary.
Avoid making safety or crime-prevention promises from lighting alone. A campus may have broader safety, security, operations, and emergency-management processes, but an article about pathway lighting should not claim that a luminaire prevents an incident or makes a route universally safe.
Use consistent cues without relying on brightness alone
Wayfinding works through a combination of route continuity, signage, landmarks, surface treatment, and lighting. Consistency can make a route easier to interpret, but consistency does not require identical equipment or brightness everywhere. The design question is whether the pattern of light supports the route hierarchy and decision points without creating uncomfortable contrasts, glare, or unnecessary spill.
For example, a team can review whether an entry or crossing is visually distinguishable from the path leading to it. That review should be based on the project’s actual conditions and photometric assumptions. It should not depend on an unsupported claim that a particular color temperature, fixture style, or branded feature produces wayfinding outcomes.
Address accessibility in the full route experience
Accessibility is not a finish applied after the lighting layout is complete. It is part of how a campus understands circulation, entries, grade changes, and obstructions. Lighting can support a legible nighttime environment, but it does not by itself establish accessibility or code compliance.
Keep accessible circulation understandable at night
The Access Board’s guidance identifies the connection between site arrival points, accessible entrances, and accessible spaces. That is a reason to put accessible-route mapping early in the pathway lighting process. The team can then check whether the lighting concept follows the route people are expected to use and whether important route information is visible under anticipated nighttime conditions.
This work should involve the people who understand the campus’s physical environment: facilities staff, accessibility staff, planners, landscape and civil teams, security or operations personnel, and qualified lighting professionals. Their roles will differ by institution. The important point is that the lighting concept is reviewed alongside the route, not in isolation.
Coordinate lighting with crossings, stairs, ramps, and signs
Crossings, stairs, ramps, handrails, signs, and surface transitions deserve specific attention because they change the visual task. The review may consider the visibility of the feature, the approach to it, and the conditions beyond it. It may also consider shadows from landscaping, poles, benches, bicycle parking, or temporary site elements.
The applicable building code, accessibility requirements, campus standards, and authority having jurisdiction govern compliance decisions. A design professional should apply the relevant requirements to the actual project. This article does not assign a universal lighting level or determine whether any path complies with the Americans with Disabilities Act or another rule.
Control glare, spill, and unnecessary light
More light is not automatically better light. A bright source in a pedestrian’s field of view can make it harder to see the path or adjacent information, even if a calculation shows light on the pavement. Similarly, light that reaches nearby windows, habitats, or areas outside the task can create operational and community concerns.
Aim and shield light for the path and adjacent spaces
DarkSky and the Illuminating Engineering Society jointly present five principles for responsible outdoor lighting: useful, targeted, low level, controlled, and warmer-colored where possible. Their Five Principles for Responsible Outdoor Lighting recommend directing light where it is needed, using the lowest light level needed, and using controls when appropriate.
For a campus pathway, these principles are a planning lens, not a certification or code determination. Ask where the light is intended to land, what users see when they approach the source, and whether adjacent areas receive unintended light. Review shielding, aiming, mounting location, and the surrounding context together. Do not assume that a fixture is DarkSky Approved, that it will reduce sky glow, or that it will deliver an ecological outcome without evidence for the specific product and project.
Use controls that match actual use
Controls should follow a campus’s operational needs, not an abstract promise of savings. A team may evaluate schedules, dimming strategies, overrides, maintenance workflows, and how a route will be used after events or during emergency conditions. The appropriate approach depends on route use, policy, equipment compatibility, and local requirements.
Document the operating assumptions in the photometric review. A calculation based on one operating condition does not automatically describe every other condition. If controls are part of the proposed design, confirm their functions, compatibility, and commissioning requirements through current, project-specific documentation.
Build a defensible photometric and procurement review
Photometry is the technical bridge between an idea for a lit path and a design that can be reviewed. It should describe the proposed conditions and the assumptions behind them. It is not merely a table of output values.
Ask for route-specific calculations and assumptions
The Illuminating Engineering Society (IES) develops consensus lighting standards and resources through a standards process. Its standards resources are an appropriate starting point for identifying applicable current guidance. The accessible IES overview does not provide a universal campus-path illuminance target, so this article does not supply one.
A useful submittal review asks what the calculation represents. Depending on the project, that can include the route plan, calculation grid, mounting locations, assumed mounting heights, pavement or surface conditions, obstructions, adjacent spaces, aiming, and the operating state being modeled. It can also include a review of glare and spill at locations that matter to the campus.
Where distribution concepts are relevant, readers can consult IES light distribution types. That explainer supports orientation; it does not replace current project photometry or establish a fixture’s suitability.
Confirm the exact product and documents
Procurement teams should avoid treating a family page, marketing description, or old submittal as a complete technical record. Confirm the exact model and configuration proposed for the route, then verify current documents relevant to the project. The document set may include photometric files, cut sheets, installation information, listings, warranty terms, controls information, and any required local or campus documentation.
LEOTEK maintains a hub for product specifications and resources. Use it to locate documentation, then confirm the document date, revision, and match to the proposed model before relying on it. This article makes no claims about a particular product’s output, efficacy, controls, listing, warranty, or suitability.
Move from concept to campus implementation
An implementation plan should make room for verification before the campus treats a layout as settled. That does not require a fabricated “before and after” story. It requires a process for checking assumptions against the locations and users the project is meant to serve.
Pilot representative route conditions
Where a campus chooses to pilot or mock up a design, it can select conditions that represent the real decision: a main path, a building entry, a crossing, a route near sensitive edges, or a location with existing obstructions. The objective is to review the proposal with relevant stakeholders under actual conditions, not to claim a guaranteed result.
Record what was evaluated, the operating condition, feedback received, and any changes to the design assumptions. A pilot does not replace applicable engineering, accessibility, electrical, or procurement review.
Review after commissioning
After installation, confirm that the completed system reflects the reviewed design and operating assumptions. Campus teams may check aiming, shielding, control schedules, route obstructions, and changes introduced during construction or landscaping. If conditions differ from the submitted design, the project team can determine whether a further review is needed.
For a defined campus pathway project, teams can discuss a roadway infrastructure project. That path supports project scoping; it does not promise availability, compliance, response time, or a particular outcome.
Questions campus teams ask about pathway lighting
What is the first step in a campus pathway lighting plan?
Begin with a nighttime route inventory. Identify arrival points, destinations, accessible-route context, crossings, entrances, changes in level, signs, adjacent conditions, and operating needs. That gives the project team a basis for defining visual tasks before evaluating equipment.
Does an accessible route have a universal lighting level?
No universal level is established in this article. The Access Board’s route guidance addresses accessible circulation, while lighting criteria require project-specific application of current guidance, local requirements, and qualified professional review. Lighting alone does not establish accessibility compliance.
How can a campus reduce glare without leaving paths unlit?
Review source visibility, shielding, aiming, mounting location, and the amount of light placed on the intended task. The DarkSky/IES principles emphasize useful, targeted, low-level, controlled lighting. Apply them with project photometry and local requirements rather than assuming a single fixture or setting solves glare.
What should a photometric submittal show for a campus path?
It should make its assumptions reviewable: route layout, calculation grid, mounting and aiming assumptions, surface conditions, adjacent areas, obstructions, controls or operating state, and the exact equipment under review. The project team should also verify current technical documents for the proposed configuration.
References
- access-board.gov, Guide to the ADA Accessibility Standards: Chapter 4; accessed July 29, 2026.
- leotek.com, outdoor lighting applications; accessed July 29, 2026.
- leotek.com, watts, lumens, and lux; accessed July 29, 2026.
- darksky.org, Five Principles for Responsible Outdoor Lighting; accessed July 29, 2026.
- ies.org, standards resources; accessed July 29, 2026.
- leotek.com, IES light distribution types; accessed July 29, 2026.
- leotek.com, product specifications and resources; accessed July 29, 2026.